
On Saturday, January 30, I will present “Streamlining Business Processes with InfoPath and Workflows” at the first SharePoint Saturday event in Indianapolis. The event is free. For more information and to register, visit http://www.sharepointsaturday.org/indy/. I hope to see you there.
Tuesday, December 29, 2009
Monday, November 23, 2009
On the Fence with SharePoint, Part Four: Moving beyond a Bad First Impression
In this fourth and final post in the series On the Fence with SharePoint, I will answer to another objection I have heard on occasion. This challenge is usually brought on by well-meaning people who miss the point. Maybe you saw a SharePoint demo by a presenter who did not have a deep understanding of the product or who did not address one of your pain points. Maybe you installed SharePoint on inadequate equipment and were not impressed with performance. In any case, SharePoint is probably not to blame. I have introduced hundreds of people from dozens of organizations to SharePoint. In every presentation I make the point: “Every organization needs SharePoint, some just do not know it yet.” I stand by that statement. SharePoint addresses such a wide range of business needs that you cannot compare it to a single competing product. If you already have competitive products to address all of the features encompassed in SharePoint, then you would likely realize a return on investment by consolidating on the SharePoint platform.
Getting there is another story. If your first impression of SharePoint was a bad one, I would encourage you to take a second look. If that is your situation, consider the following:
- SharePoint 2007 was much more solid than the 2003 release. The 2010 release will be even better. SharePoint 2010 is in beta now and the majority of our future posts will focus on the 2010 release.
- SharePoint is often not the problem. Vet your consultants. Educate yourself and your team.
- SharePoint is an enabler. If you are a careless developer, it will enable you to develop substandard solutions. If you do not govern it properly, it will enable your user community to proliferate bad practices.
Consequently, if you are a good planner, SharePoint can bring about previously unseen efficiencies in your organization through collaboration, content management, search, streamlined business processes and business intelligence. In the past before I began working with SharePoint, I have written from scratch some of the solutions delivered out of the box through SharePoint. I have also done integration with piecemealed open source solutions. I did not cut my teeth on SharePoint, rather I was drawn to it. If you have a particular need that you are curious if SharePoint will address, use our contact form to send us a note.
Friday, October 2, 2009
Data Forms and SQL Server, Part 3
At long last, I am going to finish this series on Data Forms and SQL Server. I do want to thank all of you who responded asking for the final post. I hope you will find it to be helpful. Let me start by saying that I am running SharePoint Designer 2007 with Service Pack 2. If you do not have the latest service pack, results may vary.
Continuing the FAQ exercise, I have two tables in my SQL Server database: Faqs and FaqCategories. I have created a Data Source for Faqs in SharePoint Designer and selected three columns: FaqQuestion, FaqAnswer and FaqCategoryID. Have opened the default.aspx page for my FAQ SharePoint site.

Be sure you have the appropriate Web Part Zone selected on your canvas, and choose Insert Selected Field as… –> New Item Form. Note that I did not include the FaqID column because it is an identity column in SQL Server and will be incremented automatically.

Now your canvas should look like this:

The trouble is that the FaqCategoryID column is useless to us. It is a text box right now. We want to make it a drop-down with a friendly name using the foreign key relationship to the FaqCategories table. Click on the text box to the right of the “FaqCategoryID:” label and delete it. We will add it back manually.
The first thing we need to do is drag a Data View DropDownList control from the Data View Controls section of the Toolbox onto the canvas where we just removed the FaqCategoryID text box.

The control will initially be unbound.

Then create a new Data Source for our FaqCategories table. Create the Data Source and select both the field you want to display in the drop down (FaqCategoryName), and the field you want to store in the database (FaqCategoryID).

Now go back to the design canvas and position your cursor just after the unbound control you just added. Click on the FaqCategories Data Source on the right, then select Insert Data Source Control.

The end result should be similar to this (names may vary):

Now if you click the arrow that appears when you hover over the Unbound control, you will be presented with a popup dialog. Choose the Data Fields… option.

Select the values as shown below:

“Select a data field to save values to:” is the field in Faqs that will hold the Category ID foreign key.
The “Select a data source:” section identifies the data source you just added over the FaqCategories table, the friendly name you want to display in the drop down, and the ID column value you want to supply to the Faqs table.
Save your work and open up the page in a web browser. Your web part should appear on the page similar to this:

Each time I fill in the blanks and hit the Save button, a new row is added to the Faqs table in SQL Server with the appropriate ID for the FaqCategoryID column.

Remember to give your web part a friendly title and to change the labels to something more meaningful.
Saturday, September 26, 2009
On the Fence with SharePoint, Part Three: Stop Planning and Get To Work
In this third post in the series On the Fence with SharePoint, I want to deal with the challenge that I like to call “analysis paralysis.” Again, this is not a SharePoint problem. This is an age-old IT problem. The hardest part of any project is knowing where to start – and sometimes knowing where to stop. If you are waiting for the perfect conditions to get started, you will be waiting for a long time. You can plan your portal to death, but you will not think of everything until you have had the chance to get your hands on it. Let me offer some tips to encourage you down the path:
- Take advantage of the “free” version and/or the trial. Microsoft has included Windows SharePoint Services with Windows Server. That may be the only SharePoint you ever need. Even if not, it will introduce you to many of the SharePoint features. If you know right out of the gate that Microsoft Office SharePoint Server 2007 Standard or Enterprise is what you need, no sweat -- download the 180 day trial.
- Get some training. Classroom courses are best if your company can afford it. If not, there are plenty of training resources available on the internet – many of them for free. Do the trial mentioned in the previous tip before your training – so you can bring your list of questions to ask the instructor while you have his/her attention. When you are finished training, strike while the iron is hot. Use it or lose it!
- Do not let the “experts” scare you. First of all, just because a person has a blog does not make him or her an expert. And when the experts tell you “be sure you do this” or “be sure you do not do that,” do you ever wonder how they knew? Well, they were either burned by it themselves or they learned from someone else’s mistake. There are times when you must get it right the first time – like when you are landing a plane in the Hudson River, for example. Creating a SharePoint portal? Not so much….you’ll live. Plan sufficiently (not too little and not too much). Use common sense. Mitigate risk. In other words, treat it like other implementations you have worked on.
- Prototype. I am a huge fan of prototyping. I am an even bigger fan of prototyping with SharePoint. SharePoint lists and forms really are easy to customize. Sometimes SharePoint Designer gets a bad rap as a development tool because it is not equipped for moving workflows and web parts from development to production, but I like it as a prototyping tool. The sooner you can try what you are designing, the sooner you will find the challenges that need to be addressed. Do not be afraid to throw your prototype away either. It was not meant to become an enterprise product.
- Do not let SharePoint change your business processes [unless your business processes need to change]. Talk about a flexible platform! Sure there are workflows included, and they can all be customized. In fact, you can write your own workflows from scratch. I have lead projects where business processes were not clearly defined or they needed to be rethought. That is one of the side benefits of a SharePoint implementation – the opportunity to identify broken processes and correct them. But at the same time, if it is not broken then do not change it.
A couple of weeks ago, I taught my six-year-old nephew, Andrew (a.k.a. the “flying squirrel”) how to play Tic-Tac-Toe while we were waiting for a food order. I started by drawing the game board and playing against his older brother (demo), walking him through a game (prototype) and continuing to teach him the rules as we played (education). He made some mistakes, but I gently explained how he could have done it better. He learned from it and he became better. As the SharePoint leader at your organization, you should approach your deployment this way.
SharePoint is as deep as it is wide. You absolutely will not learn this product over night, but you have got to get your hands on it to learn. So, dig in!
Monday, August 31, 2009
On the Fence with SharePoint, Part Two: Knowing Where to Start
The World Wide Web – a blessing and a curse. When I first started working with SharePoint, there were only a handful of helpful web sites. These days there are so many SharePoint-related blogs, wikis, forums and so forth that it is easy to get overwhelmed. It is great to be able to find an answer if you have a specific question, but if you are looking for a structured approach to learning it can be more complicated. Here are some tips:
1. Base your training roadmap on your SharePoint role. There are resources available for architects, developers, administrators, end-users, etc.
- Architects: There are many SharePoint Planning and Architecture documents on TechNet.
- Developers: Check out the SharePoint SDK and MSSharePointDeveloper.com. As I was drafting this blog, I received a tweet that the Developing SharePoint Applications guidance download was just made available as part of the SharePoint Patterns and Practices. This is a must read for architects as well.
- Administrators: Start with “SharePoint 2007 The Definitive Guide” by O’Reilly. It is a great overview of all of the SharePoint features.
- End-Users: This is a tough one. There are many “end user” web sites that are actually more like “no-code developer” sites. For out-of-the-box SharePoint end user help, check out “The SharePoint Shepherd’s Guide for End Users” by Rob Bogue.
2. Get classroom training. There are advantages to classroom training: an in-person expert, ability to focus, labs, collaboration with other students. Again, choose training specific to your role. Microsoft has plenty of courses from which to choose. There are some reputable training partners as well. Contact me if you would like a referral.
3. Get certified. Traditionally I have not placed much weight on certifications. I have recently become a fan, however, because I appreciate how the preparation and examination cover scenarios that I may not have previously encountered. There are certifications available for SharePoint configuration and development.
4. Work with a partner. Vet your partners, too. Using the web as a medium, it is easy to become a self-proclaimed expert these days. When you consider partners, ask for references and be wary if the vendor cannot provide any.
Sounds simple, right? No, the truth is that everyone is not starting from the same knowledge base and different people learn better in different ways. I would be happy to talk with you to help you define your training roadmap based on your experience. Use our contact form to get started.
Thursday, July 30, 2009
SharePoint 2010 Sneak Peek
I wanted to mention a couple of links with good information on SharePoint 2010. The first one is the official Microsoft page: http://sharepoint.microsoft.com/2010/Sneak_Peek/Pages/default.aspx. It includes a nice video overview, plus videos targeted at IT pros and developers. You may also find the FAQ on the site useful.
CMS Wire published an article outlining some of the new features unveiled at the Worldwide Partner Conference: http://www.cmswire.com/cms/enterprise-20/sharepoint-2010-a-business-collaboration-platform-005042.php. SharePoint 2010 will also be the primary focus of the SharePoint Conference in October.
I am also excited to be a part of the beta program for Microsoft Office 2010. It is nice to have an early look at the next release of SharePoint and the integration with all of the other Office products. I will definitely blog more about the new features when I am at liberty to do so.
Tuesday, June 30, 2009
On the Fence with SharePoint?
Almost a month has passed since I last blogged. June was chock-full of consulting, training and evangelizing. I have a thousand things I want to say, but they will have to wait. This post is for those people who are on the fence with SharePoint. If you have heard me speak before, you know my mantra is “Everyone has a need for SharePoint, some just don’t yet know it.” Said another way, “Every organization has a challenge for which SharePoint is a solution.” I stand by that statement.
I sometimes encounter organizations who have been on the fence with SharePoint for some time. They are hesitant to dive in for various reasons. Probably the three most common reasons are:
1) They do not know where to start…after being overloaded with the information freely available on the web
2) They are still working on their plan
3) They got a bad first impression of SharePoint when another company did a demo or one of their own good-intentioned people nonchalantly rolled out a SharePoint site
Of course there are other objections and each situation is different. In a series of posts, I want to respectfully address the objections I just mentioned. My objective is to help you off the fence and to guide you through the “maze” of information that our generous SharePoint community makes so readily available online.
Friday, May 29, 2009
InfoPath: The Solution for Forms
For many years, companies have struggled to find a data collection technique that crosses platforms, facilitates data analysis, handles both structured and unstructured data, and enables business processes. In contrast to many IT challenges where there are an abundance of tools but no clear approach, in this case the tools were just not up to par. Sure you could create forms using Word and/or Adobe PDF’s – you could even allow users to fill in the blanks online and print or email the form – but actually validating that data, extracting the data out of the form for analysis or launching workflows has proved to be both cumbersome and expensive. As a result, custom web pages have often been used to facilitate simple data collection – requiring specialized programming skills and valuable IT resources for what seemed to require rudimentary skills.
Enter Microsoft Office InfoPath – Microsoft’s answer to data collection challenges. InfoPath is a power user/novice developer tool that enables forms development based on an open XML format. The benefits of InfoPath are numerous:
- Ease of use and development
- Data capture and validation
- Online and offline support (via InfoPath Form Services, Outlook or the InfoPath client)
- Integration with both input and output data sources including databases, SharePoint lists and web services
- Ability to save as XML, print or send as an email
- Integration with Windows SharePoint Services and Microsoft Office SharePoint Server
By integrating with SharePoint, InfoPath offers an enterprise-level forms solution complete with business process automation and legacy software integration. Additionally, you are able to build your project teams with professionals of varying skills and levels of experience.
The InfoPath client (designer and viewer) is available as a stand-alone product or is part of the Microsoft Office Professional Plus, Enterprise and Ultimate suites. The client version integrates with Windows SharePoint Services which is included free with the Windows Server operating system. InfoPath Form Services is part of Microsoft Office SharePoint Server Enterprise Edition. Contact your Keller Schroeder sales representative to learn how to obtain InfoPath or SharePoint.
Keller Schroeder and AOS have partnered for a day of InfoPath training in Evansville on June 12, 2009. There are still seats available. For more information on InfoPath training or for a no-obligation consultation on whether InfoPath is a fit for your organization, please contact Rob Wilson by phone at 812-474-6825 or via the Contact Us link on our web site.
Friday, May 22, 2009
Using jQuery to Display Image Thumbnails in a Document Library
The SharePoint picture library is nice but unfortunately does not allow Content Approval to be used. One way to make pictures stored in a document library more accessible is to use jQuery to replace the default image icon with a thumbnail of the actual picture.
Before

The following jQuery was added to a Content Editor Web Part on the All Documents view.
<SCRIPT language=javascript src="http://jqueryjs.googlecode.com/files/jquery-1.3.2.min.js" type=text/javascript></SCRIPT>
<SCRIPT defer type=text/javascript>
$(document).ready(function(){
$("img[src$='icjpg.gif']").each(SetImage);});
function SetImage()
{$(this).attr('height','100');
$(this).attr('src',$(this).parent().attr('href'));}
</SCRIPT>
After

Friday, April 24, 2009
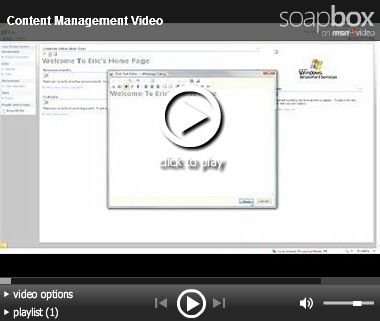
jQuery - Content Management Web Part
One of the most common requests that we have for SharePoint is the ability to make content management on a site easier and more intuitive. After seeing the potential of jQuery with SharePoint we decided to see how we could improve SharePoint content management using jQuery. What we came up with is the Content Management Web Part.
Using jQuery, icons are added above each web part on a page which give contributors to the site easy access to each web part’s properties, source and rich text editor.
Content can now be modified in one click instead of five.

When the pencil icon is clicked the Rich Text Editor is immediately opened.

When the edit icon is clicked the web part’s properties dialog is opened.

The video below shows the Content Management Web Part in action.
Download the Content Management Web Part (No Longer Available)
- The content management web part consists of jQuery added to a Content Editor web part, therefore it can be uploaded to your site through the site settings page.
- The web part currently references Google’s jQuery file. When used in a production environment this should be changed using the instruction in my previous post.
- With this edition anyone who has the "Site Settings" link has edit authority. For a more robust roles-based solution, please contact us.
Monday, April 13, 2009
Collecting SharePoint-based Data with Forms
So you have been tasked with finding the best solution for collecting data from end users and storing it on SharePoint. Sounds like a simple task at first, but there are so many options…and how do you know which one is right for your organization? Last week, at April’s Evansville SharePoint Users Group meeting I delivered a presentation titled “Go Green with SharePoint: Gather Data Electronically.” I demonstrated several approaches for collecting data for a SharePoint site using various types of forms. I was somewhat surprised by which approach seemed to be the most intriguing to the audience – forms in Microsoft Word 2007. Let me walk you through the approaches.
First, I must say that the ideal approach for gathering forms data for SharePoint is InfoPath 2007. If you have it, make it your first choice. This is what it was created for. There is much debate over whether InfoPath is a power-user tool, developer tool or information worker tool. I think it is simply a tool for people with an aptitude for developing InfoPath forms and who have been empowered to do so. I am not going to get into licensing or how to create InfoPath forms, but suffice it to say that an organization can accomplish much in the way of data collection and workflows with InfoPath and SharePoint Designer. Learn more about it at http://office.microsoft.com/en-us/infopath/FX100487661033.aspx.
So what if you do not have InfoPath and it is definitely not an option for your organization? Here is a list of some approaches ranging from out-of-the-box SharePoint to custom-written forms integrated with SharePoint:
- Built-in list forms – When you create a new list in SharePoint, forms are created for you for adding, editing, viewing and listing items in the list. These forms are customizable using SharePoint Designer.
- Surveys - SharePoint contains a simple wizard for creating surveys. One of the great features is that you can include/exclude questions based on the response to previous questions. Another benefit is that if the survey is not anonymous, then you can limit the responses to one per person. Just as with other SharePoint lists, the results may be downloaded to Excel and the forms may be customized using SharePoint Designer. A common customization is to show a “Thank you” message once the survey is completed rather than showing the overall survey results.
- DataForms – I have done a series of posts on Data Forms in SharePoint Designer, so I will be brief. This approach is where we start to move more from the out-of-the-box options to the custom options. A couple of benefits are that you do not have to be a programmer per se and you can save the results to various data stores in addition to SharePoint lists.
- Word 2007 - Many people know that you can create a form in Microsoft Word, but what you may not have known is that you can save that data directly to a SharePoint list. Here is an older blog post by the Office team to get you started. If you want more details, please leave a comment asking for more details and I will dedicate an entire post to this topic.
- Access 2007 – If you have used linked tables in Access, then this one will seem familiar to you. SharePoint lists can be linked to Access as linked tables so they work seamlessly with Access forms, queries, reports and even email forms (new in Access 2007). Again, if you would like to see an entire post dedicated to this topic, please leave a comment.
- Excel 2007 – Just as SharePoint lists can be exported to Excel spreadsheets, SharePoint list data can be imported from Excel spreadsheets.
- Outlook 2007 - Outlook can display email-enabled InfoPath forms.
- Custom .NET Webforms – Custom ASP.NET Webforms can be written using Visual Studio to read from and write to SharePoint lists. At Keller Schroeder, we have written custom SharePoint forms in ASP.NET using AJAX and Silverlight to enhance the user experience. While this provides the ultimate flexibility and user experience, it is completely custom and requires .NET web programming skills.
Each of these approaches has a place and no two organizations are the same. I would enjoy hearing about alternative approaches you may have used to collect SharePoint data.
Monday, March 23, 2009
Why SharePoint Should Be Your PMIS
A project manager’s job can be a hard road filled with twists and turns, dead ends, and potholes where you least expect them. It is not an easy job. There are many aspects to manage throughout a project, and keeping an eye on everything at all times can be tricky even on smaller projects. That’s why a Project Management Information System (PMIS) is essential. Implementing a PMIS and standardizing on how projects are managed and reported against can smooth out those bumps in the road for all levels of the organization.
In his book SharePoint for Project Management, Dux Raymond Sy provides an excellent structure for getting your PMIS started using SharePoint. What I liked most about his book was that, at its core, it was really a book about project management and good practices that help to make a project successful. These core concepts do not change, no matter what the project may be. (Come on all you project managers out there – admit it… you create a project plan for everything you do, even if it’s organizing your sock drawer!) By focusing on good project management practices, instead of just SharePoint facts and features, Dux is able to make the book resonate with project managers. As he then steps us through the relevant capabilities in SharePoint, we are able to quickly tie the “how to do it” with the “why to do it”. Of course, you can always try out one of the templates already available for tracking projects, but going through the book is also just a really good SharePoint 101 for those needing an introduction to the technology.
Okay, so we all agree that some sort of system that tracks, records, reports, and communicates is needed. Why use SharePoint for this? Why not good old Microsoft Project, or Excel, or one of the other dozens of systems out there? Well, frankly, all those options are also worthy of consideration. But, if you are already using SharePoint in your organization, why not tap into the great features of SharePoint? You have a great view for reviewing the task schedule that is similar to Microsoft Project, but it is simpler to maintain. You can update lists of tasks, issues, risks, or any other information you want to track using a datasheet view (which is similar to using Excel) but you also get all of the other great features associated with SharePoint lists -- such as alerts, built in security, and content approval. You can set up a project calendar and sync it with your Outlook calendar. Features like Announcements, Discussion Boards, and the Document Management functionality can go a long way toward facilitating communication and collaboration among team members. I am quickly becoming a huge fan of the Wiki! Wikis are great for getting all that project knowledge out of email and notes, and into SharePoint where it can be accessible to everyone and found in searches.
“But I have to report information to people who don’t have access to my SharePoint site,” you say. No problem – use the integration features within SharePoint to synchronize data between SharePoint and Project or Excel. (Heads up though, depending upon how integrated you want to be, other tools may be required.)
And why stop there? By having all of the data in SharePoint, you can roll up project data across multiple projects, allowing you to create a project management dashboard for yourself, your manager, or other stakeholders. Wouldn’t it be great to log into SharePoint and see the status of all your projects in one view? And then, with a few clicks, be able to see the details of a particular project? Yeah, this starts to get us into the realm of needing someone more technical than a project manager to set up, but it is all do-able, which is exciting stuff for us project managers!
SharePoint is not necessarily going to fulfill all project management needs for every project – let’s be clear about that. It is not necessarily a replacement for other tools like Project. However, it does fill in the gaps that other tools leave, and it can bring teams together and facilitate communication in ways that other tools cannot. So, sometimes it will make more sense to use Project independently for your project plan tracking, for example. You can still leverage SharePoint for all of the other capabilities that it brings to the table, and take advantage of something like the document library to manage updates to the Project file. The benefits you gain by getting all of the project knowledge and communication into a centralized location are still enough to make it worthwhile. I encourage you to give it a try! (Now, back to organizing that sock drawer…)
Thursday, March 12, 2009
Using the jQuery JavaScript Library in SharePoint
By now you have probably heard about jQuery, the “write less, do more” JavaScript Library. If not I would recommend a trip to their site, http://jquery.com/. jQuery makes finding and manipulating elements on a page much easier and much less painful than writing plain JavaScript.
You may be thinking “why is he talking about JavaScript on a SharePoint blog?” Well, jQuery can be used to easily enhance and modify the SharePoint user interface without having to use Visual Studio or even SharePoint Designer for that matter. This is extremely beneficial when customizing sites in a hosted environment or when you do not have remote desktop access to the SharePoint server for some other reason.
In this blog I will walk you through several ways to load the jQuery Library onto your SharePoint site or server and set up a simple hello world script. Then over several more posts I will walk through examples that show just how powerful jQuery and SharePoint can be when used together. Some examples are: hiding page elements, automatically collapsing and expanding the Quick Launch menu, enhancing the picture gallery, and the best of all… editing web part properties and content with just one mouse click.
There are several ways to get the jQuery Library onto your SharePoint page or site. I’m not going to make any claim to which method is the best; you should use the method that works best for you in your environment.
Using a document library and a Content Editor web part
This method is great for quickly adding the jQuery library to a page when you do not have SharePoint Designer.
1. Upload the jQuery Library to a document library
2. Add a Content Editor web part to your page
3. Add the following script reference to the web part using the Source Editor, making sure to change the src URL to the path of the uploaded jQuery library
<SCRIPT language=javascript src="http://<site>/<page>/<document library> /jquery-1.3.1.min.js" type=text/javascript></SCRIPT>
Spoiler: In an upcoming blog, I will show you how to use jQuery to add edit icons to all web parts on a page, making the source editor much easier to get to.

Using SharePoint Designer on a web page
This method is good when you want to store the library in a more permanent location that is not visible on the site or want to place the script directly in the page and not in a web part.
1. Open the site in SharePoint Designer
2. Copy the jQuery Library to the site in the same location as the default.aspx file
3. Add the jQuery reference in the page header by adding
<SCRIPT language=javascript src="jquery-1.3.1.min.js" type=text/javascript></SCRIPT>
under the following line:
<asp:Content ContentPlaceHolderId="PlaceHolderAdditionalPageHead" runat="server">
4. Script can then be added to any Content Editor web part on the page or directly into the page in designer
I like to use this method to add the jQuery Library under the root web of the site. You can then reference the that jQuery file from any page by simply adding the following script in a Content Editor web part.
<SCRIPT language=javascript src="http://<site>/jquery-1.3.1.min.js" type=text/javascript></SCRIPT>
Using SharePoint Designer on the master page
This method is very similar to the one above, except that by adding the jQuery reference to the master page you will be able to use jQuery on any page in that site. Just remember that each subsite will have its own master page.
1. Open the site in SharePoint Designer
2. Navigate to the _catalogs/masterpage directory and copy the jQuery Library into the site
3. Open the default.master file
4. Add the following script to the <HEAD> section of the page
<SCRIPT language=javascript src="jquery-1.3.1.min.js" type=text/javascript></SCRIPT>
5. You will then be able to use jQuery in the master page or in any site that uses the master page
Installing a feature that adds the JQuery reference on all sites
This is a good method to add jQuery to every page in a site collection if you have the ability to install a feature on the site. Jan Tielens has created just such a feature which is available at http://smarttools.codeplex.com/ . I will not plagiarize from his blog but the basic idea is to create a web control which contains the script reference. This control is included with a feature which adds the jQuery files to the layouts directory and the jQuery reference to all SharePoint pages for which the feature is scoped.
Once you have completed one of these four methods it is time to actually use jQuery to do something on our SharePoint page. The simplest way is to create a new Content Editor Web Part on a page to which the jQuery reference was added. Or add it to the existing Content Editor Web Part if you used the first method.
Start by adding the following script using the Content Editor Source Editor:
<SCRIPT type=text/javascript>
$(document).ready(function(){
alert(“Hello”);
});
</SCRIPT>
The ready() function instructs jQuery to wait until the document is loaded and ready to be manipulated.
When you refresh your page you should now see the “Hello” alert. If so, congratulations you have successfully added jQuery to your SharePoint page. If not, try viewing the source html of the page and verifying that the jQuery reference is present and points to the correct location. Also, if you copied and pasted the code above, it is also a good idea to make sure the quotes copied correctly into the Source Editor.
Replacing the alert(“Hello”); with $("A").css("color","green"); . Will turn all links on the page to green, this is a very simple example but should give you a glimpse of just how powerful jQuery can be.
Before |
After |


One other thing to remember when playing with JavaScript inside of a Content Editor web part is that adding ?Contents=1 to the page URL will display the Web Part Page Maintenance page. This is helpful because it is fairly easy to break a page by entering bad JavaScript into the Content Editor Web Part, this page allows you to easily delete the web part so your page will display properly again.
In my next post I will show you additional ways to enhance the SharePoint user experience using jQuery. Until then, take a look at the examples at http://docs.jquery.com/Main_Page and think of ways to make your SharePoint experience even better.
Friday, February 27, 2009
Data Forms and SQL Server, Part 2
There is much excitement about Data Forms in Evansville right now. As the leading SharePoint consulting firm in Evansville, we have implemented a variety of SharePoint-based forms solutions for our clients – based on what was the best solution for them. Every solution has its place: InfoPath Forms, custom web forms, AJAX-based forms and even Silverlight forms. The Data Forms are popular with power users and developers who want to be able to develop forms solutions quickly, but do not have InfoPath available to them.
In this second post of the SharePoint Data Form Web Part and SQL Server series, I will demonstrate how to maintain the FAQ Database displayed in the previous posts. I had a lot of fun trying to make the categories dropdown work just right. I will share more about that in the next post.
Using the same steps as in my previous post on Data Forms and SQL Server, I have configured two database connections in SharePoint Designer – this time to the Faqs and FaqCategories tables instead of a view. First, I will use a Data Form Web Part to add new FAQ Categories. Then I will use a Data Form Web Part to add entries to it.
First, a quick sidebar on Data Forms and Data Views: there is an option to link Data Sources together in SharePoint Designer.

This is similar to using a SQL Server View to join tables together, except that the link in this case exists in SharePoint Designer and not in the database. I explored the possibility of using this in my FAQ maintenance, but SharePoint Designer only allows Data Views against a Linked Source – no Data Forms.
So I have created my FaqCategories Data Source to the Data Source Library and switched to the Data Source Details tab. I highlight the Web Part Zone where I want to insert it – “Zone 2.”
Now, select only the FaqCategoryName field and click on Insert Selected Fields as… to display the Data View and Data Form options. The FaqCategoryID field is managed by the database itself.

I am going to add a Data View Web Part and then change the properties of the view to allow Categories to be added, changed and deleted. I am going to select the Multiple Item View option to insert a form for displaying multiple rows of data.

Next, I am going to click on Data View Properties and switch directly to the Editing tab.

Select all three checkboxes to enable edit, delete and insert. Next, click the OK button at the bottom of the dialog. The Data View now looks like this:

If I look at my page in the browser, it now is a simple web application maintenance program over a SQL Server database.

So this top Data Form can be used for maintaining the categories, but now I will add another Data Form for adding frequently asked questions and associating them with these categories. I am now looking at my Faqs Data Source in the Data Source Details tab. I will select only the FaqQuestion, FaqAnswer and FaqCategoryID and insert them as a New Item Form in a different Web Part Zone on the page. I do not need to select the FaqID column because it is the identity column for this table and automatically increments.

So now the right side of my web part page looks like this:

The problem with this is that the bottom Data Form is not user-friendly because you have to know the exact FaqCategoryID from the database in order to associate a question with a category. So I am going to change the Text Box for FaqCategoryID to a Drop Down List to make it more user-friendly. Watch for the next post – Data Forms and SQL Server, Part 3 – to see how I finish off this simple maintenance application.
Friday, January 30, 2009
Data Forms and SQL Server, Part 1
In my previous series of posts, I demonstrated how to create a FAQ page on SharePoint using two SharePoint lists. In this post I will demonstrate creating a FAQ page on SharePoint using SQL Server and the Data View Web Part. The following post will demonstrate how to maintain the SQL Server table using a Data Form Web Part. It should be noted that I often use the terms “Data Form Web Part” and “Data View Web Part” interchangeably. A Data Form Web Part is a Windows SharePoint Services 3.0/Moss 2007 phenomenon while a Data View Web Part was introduced in the previous versions. Technically, however, it could be stated that a Data View Web Part will allow one to view data from a datasource in read-only mode, while a Data Form Web Part will allow the data to be edited. With that in mind, this post will demonstrate a Data View Web Part and the following one a Data Form Web Part.
First, I should mention that I have already created two tables in a SQL Server database. One table is a FAQ Questions table and the other is a FAQ Categories. They are related via FAQCategoryID.

Also, to keep things simple I have set up SQL Server Authentication on my database, SharePointDemoDatabase. In addition, I have created a view—vFaqs—that contains FaqCategoryName, FaqQuestion and FaqAnswer.
Begin by creating a blank SharePoint site and opening its default page in SharePoint Designer. Refer to the previous posts if you need assistance. Once the site has been opened in SharePoint Designer, click Data View --> Manage Data Sources from the top menu. In the Data Source Library window, click on Database Connections to add a connection to our SQL Server database.

In the dialog that appears, click on Configure Database Connection.

Enter the required information including the server name, username and password. Leave the provider name at the default.

Because I am using SQL Server authentication, I am warned about other authors of this web site seeing the contents of the connection string. For the purpose of keeping this exercise simple, click OK to accept the warning and continue. Note that in a production environment you should use Windows Authentication with integrated security for this. The next dialog allows you to select your database in a drop-down list and then to choose the table or view that you want to display.

Select the vFaqs view. From this point on, things are just as they were in the previous posts. You may set your sorting and grouping options (I sorted mine by FaqCategoryName).

After clicking OK, click the Show Data button to see the Data Source Details. Highlight your Web Part Zone on the web page and choose Insert Selected Field as… --> Multiple Item View from the Data Source Details tab.

When the Data View is inserted into the Web Part Zone, choose the Sort and Group option in order to change the grouping options.

Be sure to check “Show group header” so that the expand/collapse icon appears in your view.

You could optionally add a secondary sort order of FaqQuestion to assist in finding questions more quickly. One final piece of clean-up that can be done is to the FaqCategoryName label that appears on the ensuing Data List. To do that, highlight the text in the label in SharePoint Designer and click the delete key. Then highlight the colon that appears just to the right of it and remove it the same way. Save the page and view it in a browser. Remove the FaqCategoryName from the list of fields to display since it is already a group field. Remove the header rows and add a title to the web part.

Assuming you have data entered, your page should look something like this:

In the next post I will demonstrate how to use the Data Form Web Part to create a user-friendly page for maintaining this list in SQL Server.
P.S. I want to add that our thoughts and prayers are with the thousands affected this week by the winter storm in Southern Indiana, Southern Illinois and Western Kentucky...and with the crews who are working tirelessly to restore their power and water.
Friday, January 16, 2009
Creating Data Forms in SharePoint Designer, Part 4: Sorting and Grouping
In the previous post I showed you how to add a Multiple Item View Data Form Web Part to your SharePoint page. Next, I will show you how to add sorting and grouping to it to make it more user-friendly. I have added some more questions to the Frequently Asked Questions list. The list currently looks like this:

I will open the web page (default.aspx) in SharePoint Designer and then click on the DataFormWebPart so that it is highlighted. You will notice the expansion arrow appear to the right:

When I click on the arrow, a menu appears for Common Data View Tasks:

I select the Sort and Group task and I am presented with the Sort and Group options window. Because I want to group by Category, I must add it first to my sort order list and then select the checkbox that reads “Show group header” with the default option of “Expand group by default”. The options now look like this:

When I click OK, I return to the Common Data View Tasks menu. From here I can set additional options such as how many items to display per page and other formatting options. I will leave everything else alone for now and save my web page. When I preview it in my browser it now looks like this:

In a future post I will demonstrate how to use the Data Form Web Part with a SQL Server database instead of a SharePoint list. I will also demonstrate how to use the Data Form Web Part to collect information from a user. Is there something in particular you would like to see demonstrated? Leave a comment and let me know.
Subscribe to:
Posts (Atom)


